Compare liquid rubber, silicone, lap sealant, and RV roof tape for EPDM, TPO, fiberglass, and aluminum roofs. Learn how to waterproof and prevent leaks.
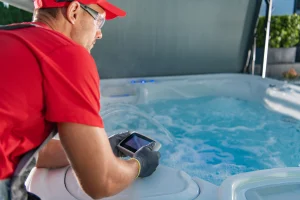
Embarking on an adventure in your RV shouldn’t come with the worry of leaks or roof damage. Most RV roof problems start small. A seam dries out. A vent gasket cracks. A little UV damage turns into a lot of water damage. If you own a camper or RV and want to not only prevent problems, but promote longevity and safety, you may need to look into a good roof sealant.
The good news is that modern RV roof sealants are effective. You just need the right product for your roof type and a basic understanding of how these sealants actually work. You don’t need to take your camper or vehicle to a dealership for a watertight seal or a complete roof overhaul. You just need the right product for your roof type and a basic understanding of how these sealants actually work.
The best RV roof sealant depends on your roof type, but liquid rubber coatings are the most versatile option for full roof protection, while silicone works best for fiberglass and metal, and lap sealants or tape are ideal for quick repairs.
This guide breaks down the best RV roof sealants for 2026, how they are tested, what works on which roof, and how to apply them without problems or issues.
In testing, most RV roof failures weren’t caused by bad products, but by mismatched sealants, poor prep, or ignoring seams. This guide is built to eliminate those mistakes by matching sealant type to roof material, movement, and real usage conditions.
If you want a complete, compatible system rather than guessing product by product, starting with a matched RV roof application system can simplify the process significantly.
Buy ProductQuick Comparison: Which RV Roof Sealant Should You Use?
| Best For | Recommended Sealant Type | Why It’s the Best Fit |
|---|---|---|
| Overall Best RV Roof Sealant |
Liquid Rubber
|
Most versatile for full roof protection. Flexes, strong seal, works on most RV roof materials with proper prep.
|
| Rubber Roofs: TPO & EPDM |
Liquid Rubber, EPDM Compatible Coating
|
Rubber roofs expand & contract a lot so flexibility matters more than hardness.
|
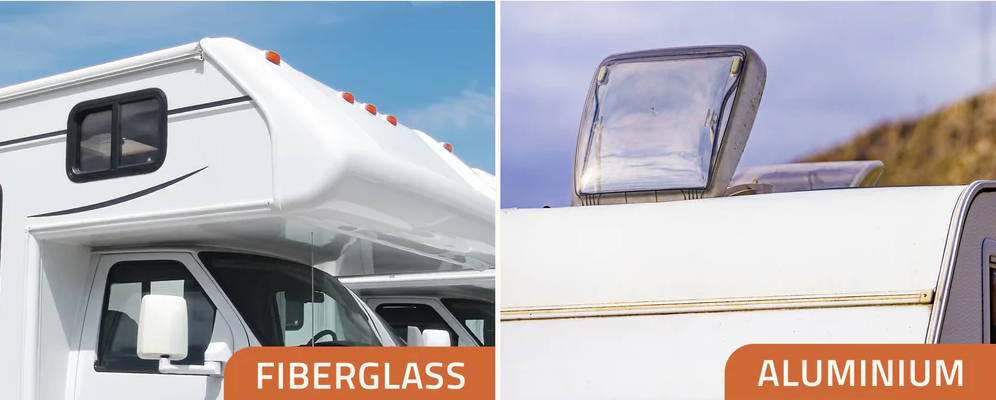
| Fiberglass & Aluminum Roofs |
Silicone Sealant; Liquid Rubber with Primer
|
Less movement so adhesion & UV resistance matters most. Primer helps bonding to smooth surfaces.
|
| Quick Leak Repair |
Self-leveling lap sealant or RV roof tape
|
Best for seams, vents, and fast fixes. Great for emergency and maintenance.
|
| Long Term Waterproofing |
Full-roof liquid rubber or silicone coating
|
Creates a continuous waterproof barrier across the entire roof for longer-lasting protection.
|
Visual Tip: Many RV owners misidentify TPO as EPDM. Checking manufacturer documentation or performing a simple surface test before sealing prevents adhesion failures.
Choosing the best RV roof sealant comes down to your roof type and how you plan to use your RV. For most owners, a liquid rubber system is the best overall option because it creates a flexible waterproof membrane that works on EPDM, TPO, fiberglass, and aluminum roofs when properly prepped. If you have a rubber roof, flexibility is critical since these materials expand and contract, making liquid rubber or EPDM-compatible coatings the most reliable choice. For fiberglass or aluminum roofs, silicone-based sealants or liquid rubber used with a primer provide stronger adhesion and better UV resistance. When you just need a quick leak repair, self-leveling lap sealant or RV roof tape works best for sealing seams, vents, and emergency problem areas. And for long-term waterproofing, nothing beats applying a full liquid rubber or silicone coating system across the entire RV roof to create continuous protection.
Understanding RV Roof Types Before You Buy Anything
Before you even think about buying sealant, you need to know what your roof is made of. This matters more than brand.
Common Mistake: Assuming all “rubber roofs” are the same. EPDM and TPO require different prep and bonding strategies despite similar appearances.
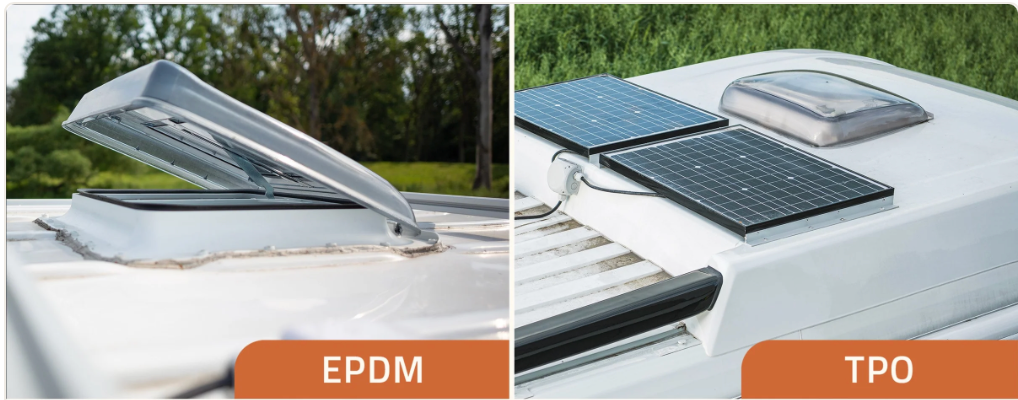
EPDM rubber roofs
The most common RV roof type. Black or white rubber membrane.
- Very flexible
- UV sensitive over time
- Needs flexible sealants
- Works best with liquid rubber systems
TPO roofs
Looks similar to EPDM but usually brighter white.
- Slightly tougher than EPDM
- Still needs flexible coatings
- Works well with rubber or silicone systems
Fiberglass roofs
Hard, smooth, usually on higher-end RVs.
- Less flexible
- Needs strong adhesion
- Silicone or rubber + primer works well
Aluminum / metal roofs
Older RVs or specialty trailers.
- Expands and contracts with heat
- Needs flexible sealant that won’t crack
- Rubber coatings or silicone are best
Rule of thumb:
If your roof moves a lot, use a flexible sealant.
If your roof is hard, then adhesion and UV resistance matter more.
Quick Recommendation
Which RV Roof Sealant Should You Choose?
The best RV roof sealant depends on your roof material, climate and exposure to the elements, and how permanent a solution you’re looking for. Liquid sealants offer seamless coverage for aging roofs, while targeted products work better for seams, edges, and repairs.
If you want the safest all-around choice for various materials or aging roofs, flexible liquid rubber systems offer the widest margin for error.
Best for full roof protection and target product compatibility:
Buy BEEST ProductsHow We Tested & Evaluated RV Roof Sealants
Testing included application on aged RV roofs, seam repairs, and full-roof coatings under varying temperature conditions, sun exposure, and light foot traffic after curing.
Roof Type Compatibility Testing
Sealants were evaluated across common RV roof materials, including EPDM, TPO, fiberglass, and aluminum, to assess adhesion, flexibility, and surface bonding without primers when applicable. However, primers are recommended prior to most liquid sealant applications.
Application & Workability
We assessed how easy each sealant was to apply in real conditions, including thickness control, spreadability, cure time, and their ability to maintain coverage despite surface flaws.
Weather Resistance & Flexibility
Sealants were reviewed for how well they handled temperature swings, UV exposure, rain, and roof movement common during travel and storage.
Seam, Edge, and Penetration Performance
Special attention was given to seams, vents, skylights, and edges where most RV roof leaks start, evaluating crack resistance and long-term sealing ability.
Maintenance & Recoat Friendliness
We considered how easy each product was to inspect, clean, touch up, or recoat over time without requiring full removal.
Types of RV Roof Sealants
Not all sealants are created equal. These are the four main categories you’ll see everywhere.
Liquid rubber sealants
These form a flexible waterproof membrane.
- Great for full roof coatings
- Excellent for rubber roofs
- Handles expansion and contraction
- Often needs primer for metal or fiberglass
Silicone sealants
Very UV resistant and long-lasting.
- Excellent sun protection
- Great for fiberglass and metal
- Harder to recoat later
- Slightly less flexible than rubber
Self-leveling lap sealants
Thick caulk-like products for seams.
- Perfect for vents and edges
- Not for full roof coating
- Great spot-repair tool
Tape-based sealants
Adhesive-backed waterproof tape.
- Super fast emergency fix
- Works well over seams
- Not pretty, but effective
- Good backup solution
Most people end up using two:
A coating system for the roof + lap sealant or tape for seams.
How to Choose an RV Roof Sealant
Ask yourself these important questions from the essential categories.
There are a number of effective products on the market for repairing, sealing, and protecting your RV roof.
Not all factors matter equally. For RV roofs, flexibility and adhesion matter far more than hardness or shine.
Adhesion and bonding
Does it actually stick after curing?
Waterproofing and leak resistance
Does water bead and stay out?
UV and weather durability
Does it chalk, crack, or peel in the sun?
Ease of application
Can a normal person apply this?
Cure time and drying
How long until rain-safe?
Long-term maintenance needs
Does it require yearly touch-ups?
DIY Recommended RV Roof Sealants of 2026
Disclaimer: This guide references RV roof sealant products manufactured by BEEST. These products are included based on their intended use and performance in common RV roofing applications. These recommendations reflect real-world testing and evaluation criteria outlined in this article.
There are a number of brands whose sealants work well. If you want a system of great products that are compatible and provide excellent coverage and protection, BEEST stands out as a brand offering a variety of effective and reliable DIY roofing alternatives.
These products work best when used together as a system rather than mixed with incompatible brands.
| Product | Best For | Works On | Key Benefits | Why Choose |
|---|---|---|---|---|
| BEEST Roof Sealant Liquid Rubber | Full roof coating and long term protection, protection from leaks, watertight membrane | EPDM, TPO, fiberglass, aluminum | Flexible waterproof membrane, good UV resistance | Ideal for coat once, relax; full roof restorations and durable protection |
| BEEST Silicone Premium Liquid Rubber | High UV climates and long-lasting protection, moisture and leak protection | Fiberglass, metal – works well when matched correctly | Excellent sun protection, strong UV defense, longer lifespan in harsh climates | Best when you want maximum UV resistance and durability on harder surfaces |
| BEEST Multipurpose Primer | Prep step for better bonding | Metal, fiberglass, supports better bonding where needed | Improves adhesion reduces coating failure | The often overlooked yet critical step that helps coatings stick and last longer |
| BEEST RV Seam Tape, Waterproof Tape & RV Roof Sealant | Seams, edges, vents, preventative maintenance, contractor grade leak protection, impenetrable waterproofing | Seam areas on most RV roofs | Tape for quick sealing, liquid for reinforcing | Great for fast repairs and reinforcing common leak zones before problems start, work with liquid rubber or silicone |
| BEEST SeamSecure Fabric – 100% Stitch-Bonded Polyester Waterproofing Membrane | Rubber roof maintenance and compatibility, durable and reliable leak prevention in various applications | EPDM rubber roofs | Wide compatibility, better longevity, easy application, contractor grade strength | Fix leaks & reinforcing seams, cracks, vents, and more, work with liquid rubber or silicone |
How to Apply RV Roof Sealant (Step-by-Step)
Most failures come from rushing this part.
Surface prep and cleaning
This matters more than the product.
- Sweep off debris
- Wash with RV roof cleaner
- Remove old loose sealant
- Let dry completely
Repairing cracks and seams
Use lap sealant or tape first.
Seal:
- Vents
- Skylights
- Antennas
- Edge seams
Then coat over everything.
Applying liquid sealants
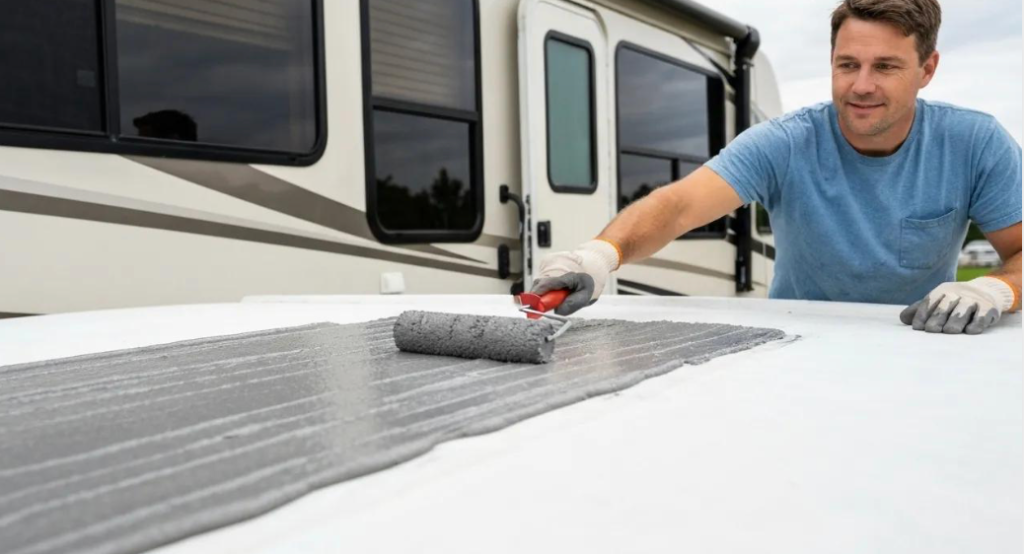
Use:
- Brush for edges
- Spray for detail (if allowed)
- Roller for large areas
Apply thin, even coats. Applying too thick in a single pass is one of the most common DIY failures. Multiple thin coats cure better and last longer.
Cure time and weather window
Plan for:
- Dry weather
- Moderate temps
- No rain for at least 24 hours
Walking on the roof after sealing
- Usually safe after full cure.
- Don’t walk early. You’ll ruin the membrane.
Durability: How Long Do RV Roof Sealants Last?
This depends on:
Expected lifespan by material
Liquid rubber: 5–10 years
Silicone: 10+ years
Lap sealant: 1–3 years
Tape: 1–5 years
Factors that shorten sealant life
- UV exposure
- Poor prep
- Standing water
- Cheap materials
- Skipping primer
Signs it’s time to reseal
- Cracking
- Peeling
- Chalky surface
- Leaks at seams
Maintenance & Inspection Tips
This part saves thousands in repairs.
How often to inspect your RV roof
At least twice a year.
Cleaning without damaging sealant
- Soft brush
- Mild soap
- No pressure washer
Preventing future leaks
- Touch up seams yearly
- Keep debris off roof
- Reseal before failure, not after
Common Mistakes That Cause RV Roof Leaks
Using the wrong sealant type
Rubber roofs with rigid coatings = cracks.
Sealing over dirt or moisture
Nothing sticks to grime.
Skipping primer when needed
Metal and fiberglass need it.
Ignoring seams and edges
Most leaks start there.
Mixing silicone and rubber systems without compatibility checks
Safety & Prep (PPE, Ventilation, Weather)
Gloves and eye protection
Basic but important.
Working in heat vs cold
Too cold = poor cure
Too hot = fast flashing
Avoiding chemical runoff
Don’t wash residue into drains.
Morning application
Can provide the best cure window due to lower surface temperatures.
FAQ: RV Roof Sealants
Liquid rubber systems are the most versatile. They provide excellent flexibility, good adhesion to various RV roof materials (EPDM, TPO, fiberglass, aluminum), and create a seamless, waterproof membrane. They handle expansion/contraction well and offer strong long-term protection against leaks when applied correctly with proper prep and primer if needed.
Silicone lasts longer in the sun due to superior UV resistance and slower degradation in high-heat/sun climates. Rubber (liquid rubber) is more flexible and better at handling roof movement/expansion/contraction without cracking. Choose silicone for extreme sun exposure or harder surfaces; choose rubber for overall versatility and flexibility on most RV roofs.
Yes, if it’s clean, compatible, and in good condition. Thoroughly clean the old sealant (remove loose/flaking material), check compatibility (e.g., silicone over silicone, rubber over rubber — avoid mixing incompatible types), and use a primer if recommended. Test a small area first to ensure adhesion. If the old layer is failing heavily, it’s better to remove as much as possible for a long-lasting repair.
It depends on square footage, number of coats, and product coverage rate. Most liquid rubber/silicone coatings cover 50–100 sq ft per gallon per coat (check label). For full roof restoration: plan 2–3 coats. Example: a typical 30 ft RV roof (~300–400 sq ft) may need 4–8 gallons total for multiple coats. Always buy 10–20% extra for overlaps, seams, and waste.
Yes, with proper primer. Metal (aluminum) roofs are smooth and non-porous, so adhesion can be tricky without prep. Use a multipurpose primer designed for metal, clean thoroughly (degrease), and apply a flexible sealant like liquid rubber or silicone. Silicone often performs well on metal due to UV resistance; liquid rubber works great with primer for flexibility.
Minimum 24 hours dry time before rain for most sealants (check product label). Longer is better — ideal is 48–72 hours for full cure, especially in humid or cooler conditions. Avoid sealing if rain is forecast within 24–48 hours. Some products allow light rain after 4–6 hours, but full waterproofing needs longer cure time to prevent wash-off or bubbling.
Conclusion: Choosing the Right RV Roof Sealant in 2026
RV roof sealants aren’t complicated. People just make them complicated.
Here’s the real formula:
- Know your roof type
- Prep properly
- Use flexible coatings
- Seal seams first
- Let it cure fully
A good RV roof sealant doesn’t just stop leaks. It prolongs the life of your RV or camper, and provides safety, saves you costly repairs at a dealership, and provides peace of mind, so you can better enjoy your adventures on the road, camping in the outdoors, or RVing across America.
When your roof is sealed correctly, leaks stop being a constant worry and your RV becomes what it was meant to be: a reliable home base for wherever the road takes you.