Why Pipe Insulation Matters More Than Most Homeowners Think
Most people don’t think about their pipes… until winter hits.
Then suddenly:
- faucets stop running
- pipes freeze
- and worst case, they burst
And that’s where things get expensive.
Pipe insulation is one of those simple upgrades that quietly does a lot:
- helps prevent frozen pipes
- reduces heat loss
- lowers energy bills
- protects your plumbing long-term
It works by slowing down how quickly pipes lose heat to the surrounding air, which helps keep water above freezing longer.
But here’s the key thing most guides don’t say clearly:
👉 Insulation doesn’t add heat—it just helps keep the heat you already have.
That’s why doing it right (and combining it with a few smart habits) matters.
Insulation helps reduce heat loss and improve efficiency in plumbing systems, as noted in general plumbing and energy studies.
If you’re trying to figure out how to insulate water pipes to prevent freezing in winter, this guide walks you through exactly what to do.
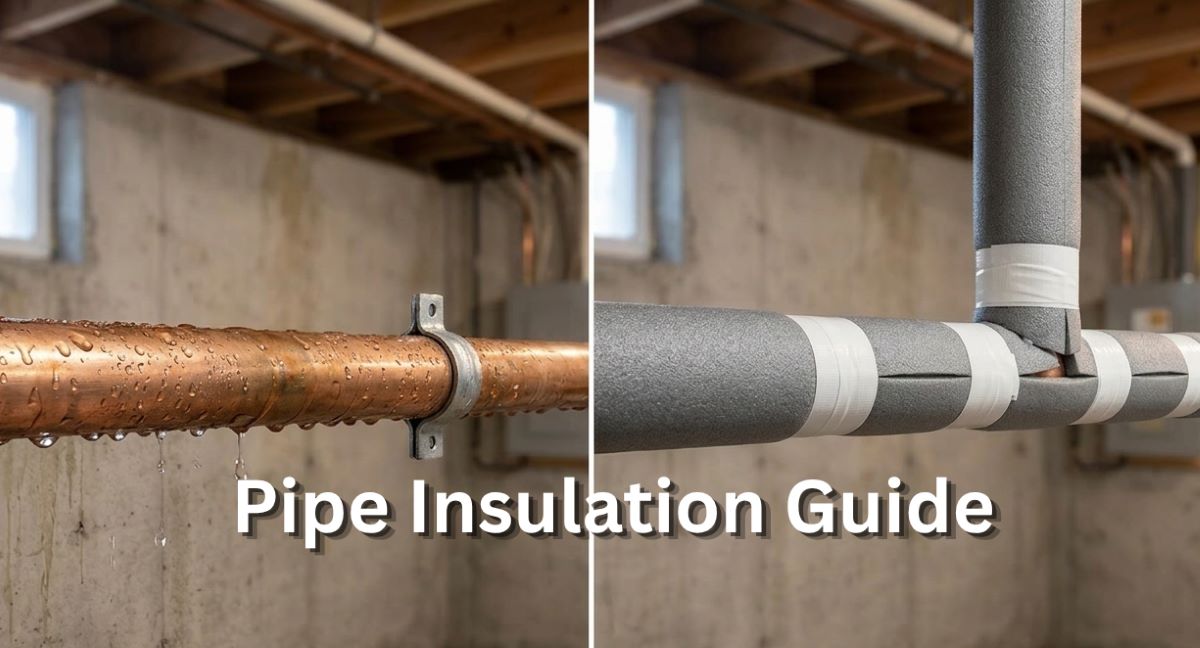
What Pipe Insulation Actually Does
Pipe insulation creates a thermal barrier around your pipes.
In simple terms:
- it slows heat loss
- keeps water warmer longer
- reduces exposure to freezing air
This doesn’t make pipes “freeze-proof,” but it buys you time—which is often the difference between no issue and a burst pipe.
It also:
- improves hot water efficiency
- reduces condensation
- helps extend pipe lifespan

Where Pipes Are Most Likely to Freeze
Not all pipes are at equal risk.
Focus on:
- pipes in basements near exterior walls
- crawl spaces and attics
- garages
- under sinks on exterior walls
- outdoor hose bibs
These areas are more exposed to cold air and temperature swings.
Types of Pipe Insulation
There are a few common options, each with its place.
Foam Pipe Insulation
- most common
- easy to install
- affordable
Pipe Wrap Insulation
- flexible wrap or tape
- good for tight or irregular areas
Fiberglass Insulation
- higher temperature resistance
- requires careful handling
Spray Foam Insulation
- seals gaps and air leaks
- adds an extra layer of protection
This is where products like BEEST Spray Foam Insulation Kit can make a big difference—especially around pipe entry points, wall gaps, and hard-to-reach areas where cold air sneaks in. It not only insulates but also seals those small openings that traditional pipe wrap can’t cover.
Because often, it’s not just the pipe—it’s the draft around the pipe causing the problem.
When to Insulate Pipes for Winter
The best time to insulate pipes is:
👉 before temperatures drop below freezing
Ideally:
- early fall
- before the first cold snap
Waiting until pipes are already freezing puts you in reaction mode instead of prevention.
How to Insulate Water Pipes to Prevent Freezing
Here’s a straightforward approach that works for most homes.
Step 1: Identify At-Risk Pipes
Walk through your home and look for:
- exposed pipes
- unheated areas
- drafty spots
Focus your effort where it matters most.
Step 2: Measure and Cut Insulation
- measure pipe length and diameter
- cut insulation to fit
- avoid gaps
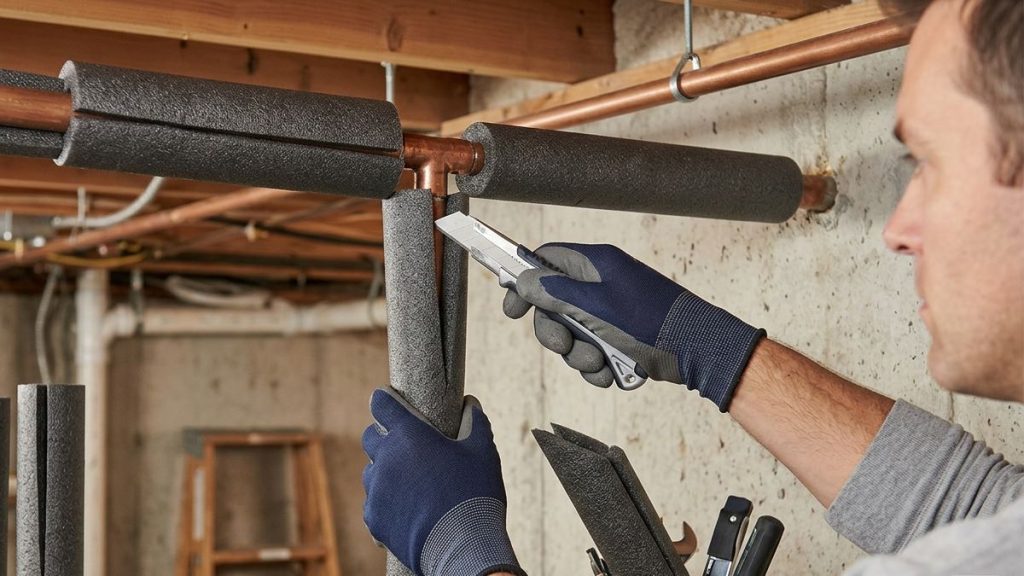
Step 3: Install Pipe Insulation
- snap foam sleeves over pipes
- wrap tightly
- seal seams with tape if needed
The goal is full coverage with no exposed sections.
Step 4: Seal Gaps and Drafts
This step is often overlooked—but it’s huge.
Use spray foam to seal:
- holes where pipes enter walls
- gaps around foundations
- air leaks near plumbing
This prevents cold air from reaching the pipes in the first place.
A spray foam solution like the BEEST Spray Foam Insulation Kit works especially well here because it expands to fill irregular gaps, helping block cold air at the source.
This step alone can make a noticeable difference in how well your pipes hold up during cold snaps.
Step 5: Check and Reinforce
- look for missed spots
- double-check connections
- reinforce high-risk areas
Extra Protection for Extreme Cold
If you live in colder climates, insulation alone may not be enough.
Consider adding:
- heat tape or heating cables
- letting faucets drip during extreme cold
- keeping indoor temperature consistent
These work alongside insulation to reduce risk.
Common Mistakes to Avoid
Thinking Insulation Alone Prevents Freezing
It helps—but doesn’t eliminate risk in extreme cold.
Leaving Gaps in Insulation
Even small exposed sections can freeze.
Ignoring Air Leaks
Cold air is often the real problem.
Waiting Too Long
Once freezing starts, prevention becomes harder.
Frequently Asked Questions
Use foam sleeves or wrap insulation around exposed pipes and seal gaps to prevent cold air exposure.
It helps delay freezing by slowing heat loss, but additional measures may be needed in extreme cold.
Foam pipe insulation is the most common and effective option for most homes.
Yes—especially for sealing gaps and preventing cold air from reaching pipes.
Spray foam is best used around pipe entry points, wall gaps, and areas where cold air can reach pipes. It works alongside traditional insulation to improve overall protection.
The Bottom Line
Pipe insulation is one of the simplest ways to protect your home from winter damage.
It’s not complicated.
It’s not expensive.
But it’s ome of those things that pays off quickly. .
By slowing heat loss, sealing drafts, and protecting vulnerable pipes, you can:
- prevent freezing
- avoid costly repairs
- improve energy efficiency
Do it before winter hits, and your pipes stay quiet… instead of becoming a problem you have to deal with later.