You’ve probably felt cold drafts creeping in through your garage, temperature fluctuations in your home from room to room, and areas in your living spaces that just don’t feel comfortable. And it’s almost a sure bet that you have experienced high energy bills; it seems like we all have.
Many people feel helpless when it comes to these common problems and hesitate to do anything about these issues.They assume they’re going to have to spend a lot of money hiring contractors to seal spaces or do major renovation. But what many don’t realize is that DIY spray foam insulation is often the missing piece. It’s not only accessible; it’s designed for people who want to seal and protect their own spaces without professional help.
With modern kits, clear instructions, and the right prep, homeowners can tackle targeted insulation projects themselves and get professional-level results without hiring a contractor.
Most insulation failures in DIY projects aren’t caused by bad products. They happen because homeowners misunderstand where foam works best, how much to apply, or how temperature affects expansion. This guide is designed to remove that guesswork.
Quick Recommendation: Is DIY Spray Foam Right for You?
DIY spray foam insulation is a strong option if you’re trying to seal drafts, improve comfort, or insulate hard-to-reach spaces without committing to a full contractor install.
- Best for: Small to medium insulation projects, draft sealing, garages, rim joists, utility areas
- Foam type to know: Closed-cell spray foam for higher insulation value and moisture resistance
- Skill level: Beginner-friendly with proper prep and safety steps
- Time commitment: Most DIY projects can be completed in a single day
DIY spray foam is ideal for targeted sealing and insulation, but it’s not a replacement for full-home insulation retrofits. Knowing the difference prevents overuse and wasted material.
If your goal is targeted improvement rather than whole-home insulation, DIY spray foam often delivers the biggest impact for the effort.
Buy ProductWhy Homeowners Choose DIY Spray Foam Insulation
Spray foam insulation works differently than traditional materials like fiberglass batts or rigid boards. Instead of fitting into place, it expands on contact, filling cracks, gaps, and irregular cavities that other insulation types often miss.
This expansion allows spray foam to act as both an insulator and an air seal. That air sealing effect is often what delivers the biggest comfort improvement. Reducing uncontrolled airflow stabilizes temperatures and can noticeably lower heating and cooling demand.That dual function is why it’s frequently chosen for spaces where drafts, moisture, or uneven temperatures are a problem.
DIY kits make it possible to address specific areas without specialized equipment, making them ideal for garages, rim joists, wall penetrations, and utility spaces.
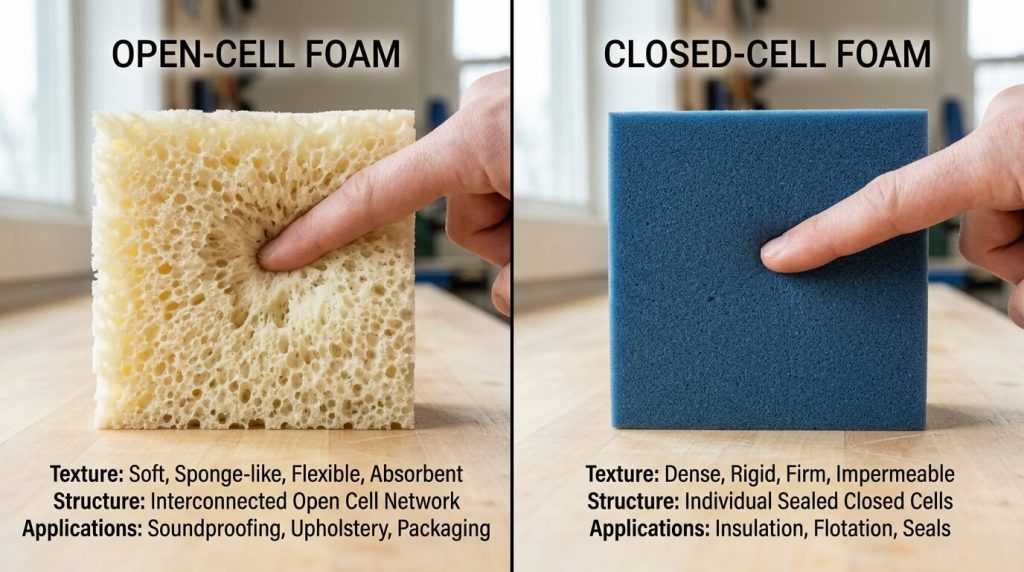
Spray Foam Basics — Open-Cell vs Closed-Cell
Before starting any project, it’s important to understand the two primary spray foam types.
Open-Cell Spray Foam
Open-cell spray foam has a soft, sponge-like structure. It expands significantly and is often used for sound dampening or interior applications where flexibility is helpful.
It generally has a lower R-value per inch and offers less moisture resistance, which limits where it’s best used.
Closed-Cell Spray Foam
Closed-cell spray foam is denser and more rigid. It expands less than open-cell foam but provides higher insulation value per inch and stronger moisture resistance.
Because of its performance and durability, closed-cell foam is the most common choice for DIY insulation kits used in garages, basements, crawl spaces, and exterior-adjacent areas.
Open-cell = flexibility and sound dampening
Closed-cell = insulation, moisture resistance, and strength
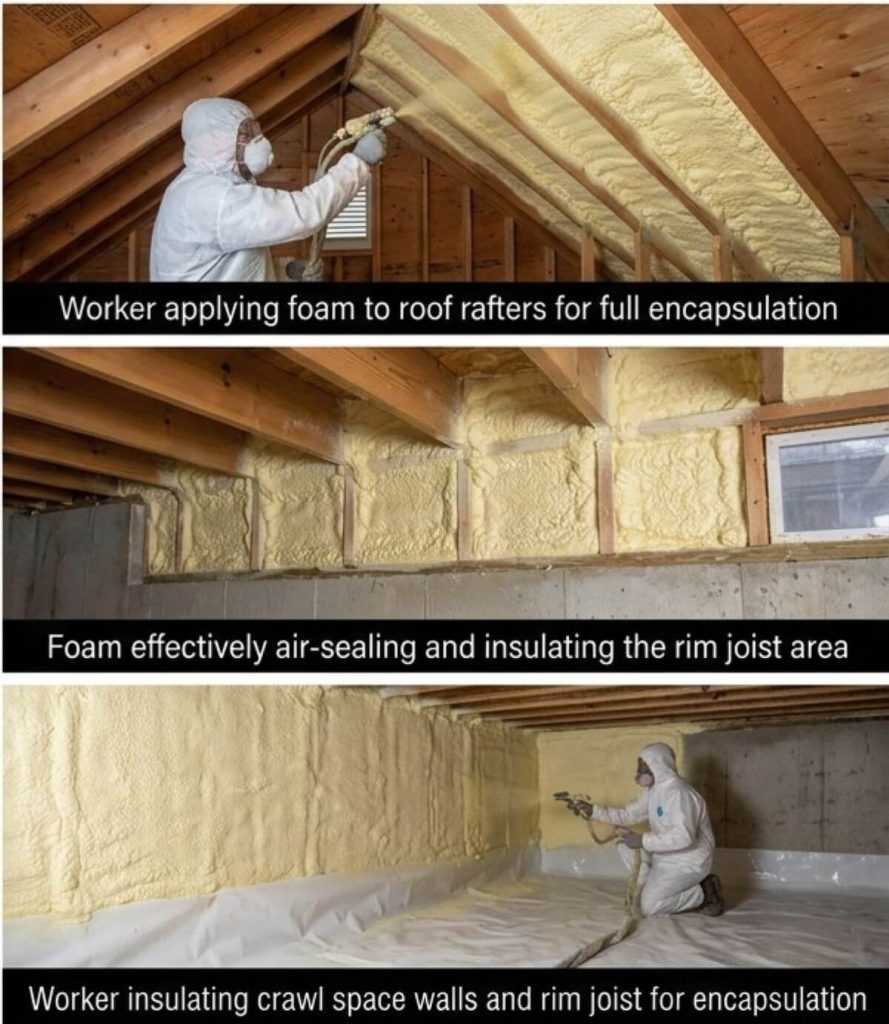
Where Spray Foam Works Best in a Home
Spray foam isn’t always necessary everywhere, but it excels in specific locations.
Attics and Ceilings
Helps seal penetrations around wiring, ductwork, and access points.
Walls and Rim Joists
One of the most effective areas for spray foam due to air leakage and heat loss.
H3: Crawl Spaces and Basements
Closed-cell foam performs well where moisture control and insulation matter.
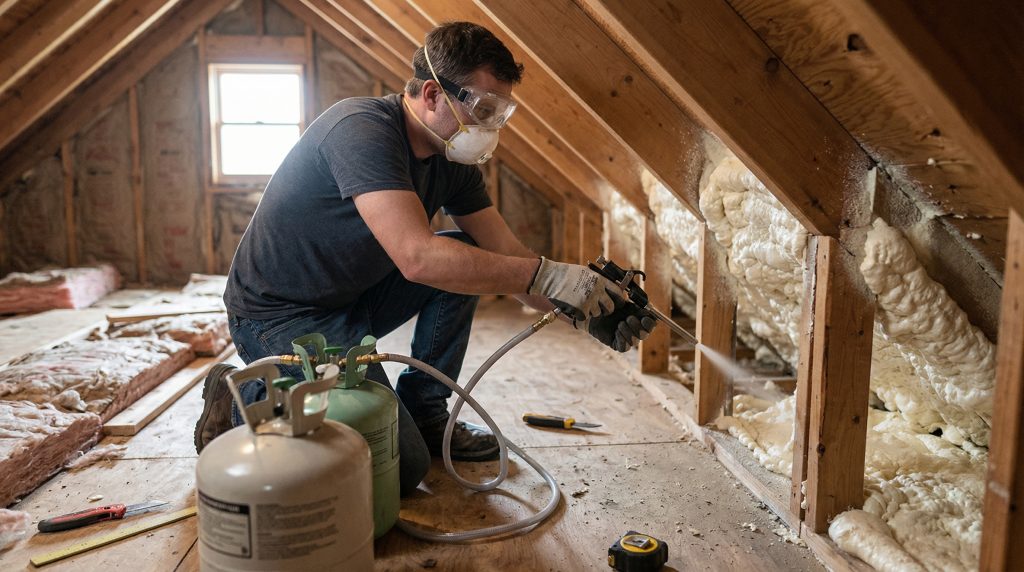
H3: Garages and Outbuildings
Garages are one of the most common DIY spray foam projects. Proper insulation can stabilize temperatures, reduce drafts, and limit heat transfer into adjacent living spaces.
Image suggestion: places in home to spray – garage, outbuilding, attic, etc.
Alt Text: DIY spray foam insulation is great for a variety of places in your home and property.
Where Spray Foam Isn’t Ideal
Spray foam isn’t meant for large open cavities intended for fiberglass systems, areas needing future wiring access, or spaces requiring vapor permeability. Understanding limitations prevents costly mistakes.
Equipment You’ll Need for a DIY Spray Foam Project
Preparation matters just as much as the foam itself. Proper preparation determines how well foam bonds and cures. Skipping prep is one of the most common beginner mistakes.
Safety Gear
Gloves, eye protection, and proper ventilation are essential during application.
Surface Preparation Supplies
Surfaces should be clean, dry, and masked where necessary to prevent overspray.
Spray Foam Insulation Kit
A complete kit simplifies the process by including pre-measured components and an applicator designed for first-time users.
Coverage Expectations & Planning
Understanding how much spray foam you’ll need is one of the most overlooked parts of a DIY insulation project. Many beginners assume kit coverage numbers are exact, but real-world conditions almost always affect yield.
Most spray foam kits are rated in board feet, which equals a 12″ × 12″ area at 1″ thickness. That rating assumes ideal temperature conditions, smooth surfaces, and controlled application. In practice, uneven cavities, porous materials, and thicker passes will reduce effective coverage.
Surface absorption also plays a role. Rough framing lumber, masonry, or older materials may absorb more foam during initial passes, which slightly lowers total yield. Planning with a modest buffer helps prevent running out of material mid-project.
Another common factor is overfill waste. Spray foam expands rapidly, and beginners often apply more than necessary. Excess foam must be trimmed, which doesn’t affect performance but does reduce usable coverage. Applying controlled, thin passes improves both efficiency and final results.
Taking a few minutes to plan coverage ensures smoother workflow, better budgeting, and fewer interruptions once spraying begins.
Safety Precautions Before You Start
Every reputable DIY spray foam guide stresses safety. Proper ventilation, protective gear, and adherence to manufacturer instructions are critical.
Take the time to prepare your workspace, control airflow, and protect nearby surfaces. These steps prevent mistakes and make application far smoother.
Never spray in enclosed spaces without airflow planning. Foam chemicals react during curing, and proper ventilation protects both health and finish quality.
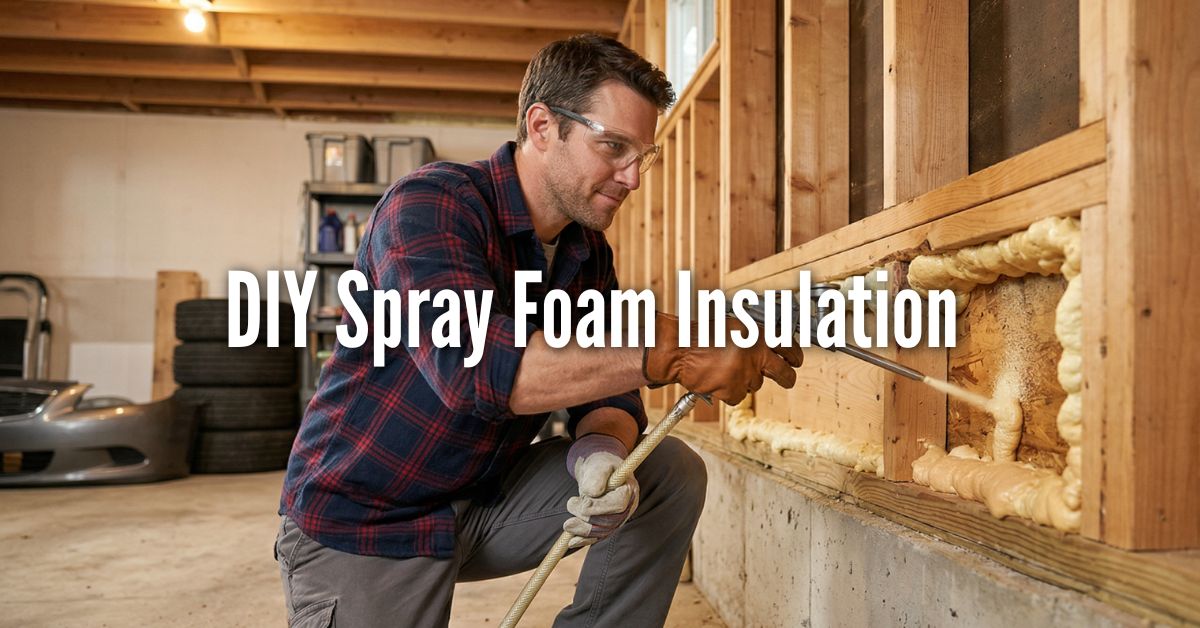
Step-by-Step DIY Spray Foam Application
Step 1 – Prepare the Area
Clean surfaces, mask off nearby areas, and confirm temperature conditions. Foam expansion and curing are temperature dependent. Cold surfaces reduce adhesion and expansion, while extreme heat can cause rapid flashing.
Step 2 – Set Up the Kit
Assemble the applicator and review instructions before spraying.
Step 3 – Apply in Controlled Passes
Apply foam evenly. Expansion happens after spraying, so start conservatively. Applying too aggressively is the most common beginner mistake. Foam expands rapidly, and overfilling can distort surfaces or waste material.
Step 4 – Allow Proper Curing
Let the foam expand and cure fully before trimming.
Step 5 – Trim and Finish
Trim excess foam for a clean, finished surface.
Common DIY Spray Foam Mistakes
Even beginner-friendly spray foam kits can produce poor results if applied incorrectly. Most DIY issues come down to technique, preparation, or environment rather than product quality.
Spraying Too Thick
One of the most frequent mistakes is applying foam too aggressively in a single pass. Spray foam expands after application, and overfilling cavities can distort surfaces or waste material. Multiple thin passes allow better expansion control and more consistent curing.
Skipping Ventilation
Proper airflow is essential during spraying and curing. Foam components react chemically, and enclosed spaces without ventilation can create discomfort and uneven curing. Planning airflow protects both the installer and the finish quality.
Poor Surface Preparation
Foam bonds best to clean, dry, stable surfaces. Dust, debris, or moisture reduce adhesion and can lead to weak spots or separation over time. Thorough prep dramatically improves long-term performance.
Wrong Temperature Application
Spray foam performance depends heavily on temperature. Cold surfaces reduce expansion and bonding, while excessive heat may cause uneven curing. Always follow manufacturer temperature guidelines and allow materials to acclimate before spraying.
DIY Spray Foam Options from BEEST
Using a matched system reduces compatibility guesswork and simplifies application for first-time users.
BEEST FullStop™ Spray Foam Insulation Kit
Designed for homeowners handling small to medium insulation projects, this closed-cell spray foam kit supports air sealing and insulation in wall cavities, drafts, and utility areas.
BEEST FullStop™ Garage Insul8™ Insulation Kit
Built specifically for garage applications, this kit helps regulate temperature, reduce drafts, and improve comfort in garage spaces used for storage, workshops, or daily access.
Maintenance Tips and Troubleshooting
Once cured, spray foam requires minimal maintenance. Check coverage after curing and address missed areas with light touch-ups if needed. Avoid overfilling cavities and always allow full curing time before finishing surfaces.
If foam appears uneven after curing, lightly trim and apply controlled touch-up passes rather than overfilling in one attempt.
Frequently Asked Questions About DIY Spray Foam Insulation
For targeted insulation and air-sealing projects, many homeowners find DIY spray foam to be cost-effective and impactful. Because it expands to fill gaps and irregular spaces, it helps address drafts and temperature inconsistencies.
Spray foam can be applied in most seasons, but temperature plays a major role in performance. Both the surface and foam components should stay within the recommended temperature range.
When installed properly, spray foam insulation can last for decades while maintaining its air-sealing and insulating properties.
Spray foam expands to fill cracks and gaps, creating a strong air seal that significantly reduces drafts. When applied correctly, this seal can remain effective for many years.
How much area does a spray foam kit cover?
Coverage depends on the kit size, foam expansion rate, surface conditions, and application thickness. Manufacturers usually rate kits by board feet, which equals a 12″ × 12″ area at 1″ thickness. Real-world coverage may vary if surfaces are uneven or if foam is applied thicker for insulation performance. Planning for a small margin of extra material helps avoid running short mid-project.
Can spray foam be removed if applied incorrectly?
Yes, but removal can be labor-intensive once the foam has cured. Small mistakes can often be trimmed or sanded flush. Larger misapplications may require scraping or cutting tools to remove hardened foam. The best prevention is careful masking, controlled passes, and testing spray technique on scrap material before working in visible areas.
Final Thoughts — Is DIY Spray Foam Right for You?
DIY spray foam insulation is about solving specific problems, not insulating everything at once. When used strategically, it seals drafts, improves comfort, and reduces energy loss with relatively little disruption.
When applied correctly, spray foam insulation transforms problem areas into sealed, efficient spaces that feel noticeably more comfortable year-round.