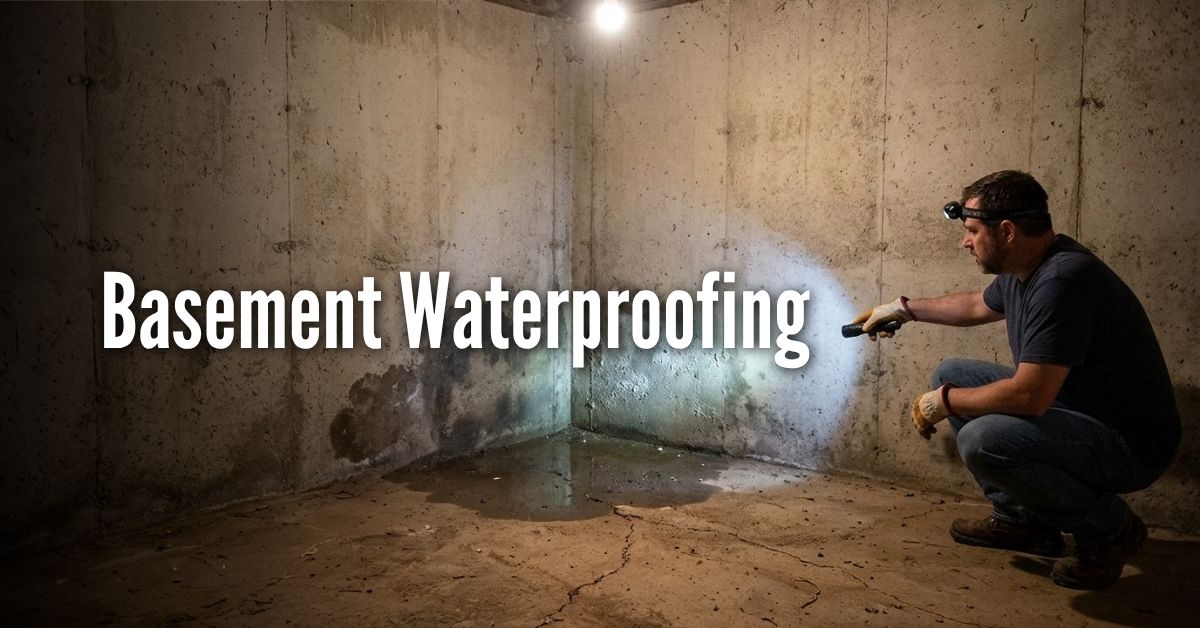
Why Basement Waterproofing Matters (More Than Most People Think)
A damp basement isn’t just annoying—it’s usually a warning sign.
What starts as:
- a musty smell
- a small crack
- a little moisture on the wall
…can turn into:
- mold issues
- foundation damage
- expensive repairs down the road
The good news?
A lot of homeowners can handle basement waterproofing themselves, especially when the issue is surface-level moisture or minor leaks.
This guide walks you through how to waterproof a basement from the inside without hiring a contractor, using methods that actually work in real homes—not just in theory.
Whether you’re dealing with light seepage or trying to fully stop basement leaks, the right approach makes all the difference.
What Causes Basement Leaks?
Before you fix the problem, you need to understand it.
Most basement leaks come from:
- Hydrostatic pressure (water pushing through walls) — which is one of the most common causes of basement moisture issues, as explained by the U.S. Geological Survey
- Foundation cracks
- Poor drainage outside the home
- Porous concrete absorbing moisture
Concrete might look solid, but it’s actually porous—like a sponge over time.
That’s why sealing and protecting it properly matters.
Interior vs Exterior Waterproofing
Let’s clear something up quickly.
Exterior waterproofing:
- digging around your foundation
- installing drainage systems
- expensive and labor-heavy
Interior waterproofing (DIY approach):
- sealing cracks
- applying waterproof coatings
- managing moisture inside
For most homeowners dealing with minor leaks or dampness, interior waterproofing is:
- faster
- more affordable
- completely doable on your own
Interior waterproofing won’t solve major structural water issues, but for most common basement moisture problems, it’s more than enough.
Tools & Materials You’ll Need
You don’t need a contractor’s truck full of equipment.
Most DIY basement waterproofing projects require:
- Wire brush or concrete cleaner
- Caulk gun
- Crack filler or hydraulic cement
- Waterproof coating or basement sealer
- Roller or sprayer for application
Products like BEEST Waterproof Sealant are designed specifically for this kind of job—giving you a consistent, even barrier without needing professional equipment.—helping create a barrier that keeps moisture from penetrating the surface.
If you’re working with concrete floors or walls, other sealers in the BEEST concrete line can also help depending on the surface condition.
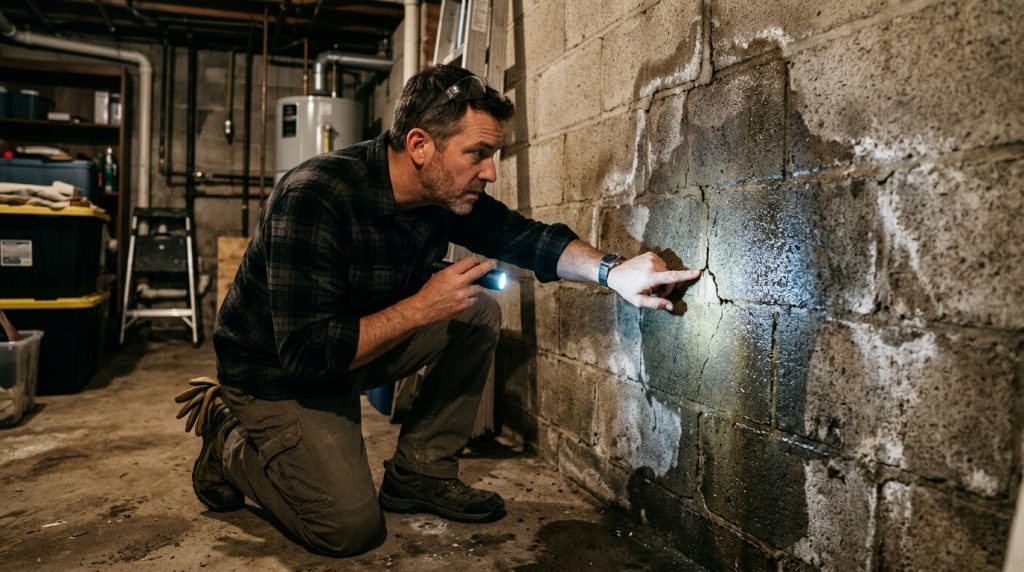
Step 1: Identify Where Water Is Coming From
Before sealing anything, take a close look at where the moisture is showing up.
Check for:
- cracks in walls or floors
- water stains or discoloration
- areas where walls meet the floor (common leak point)
- active dripping vs general dampness
A simple trick:
Tape a piece of plastic to the wall and leave it for 24 hours.
- moisture behind the plastic = water coming through the wall
- moisture in front = humidity issue
This simple test can save you a lot of guesswork before you start sealing everything.
This helps you choose the right fix.
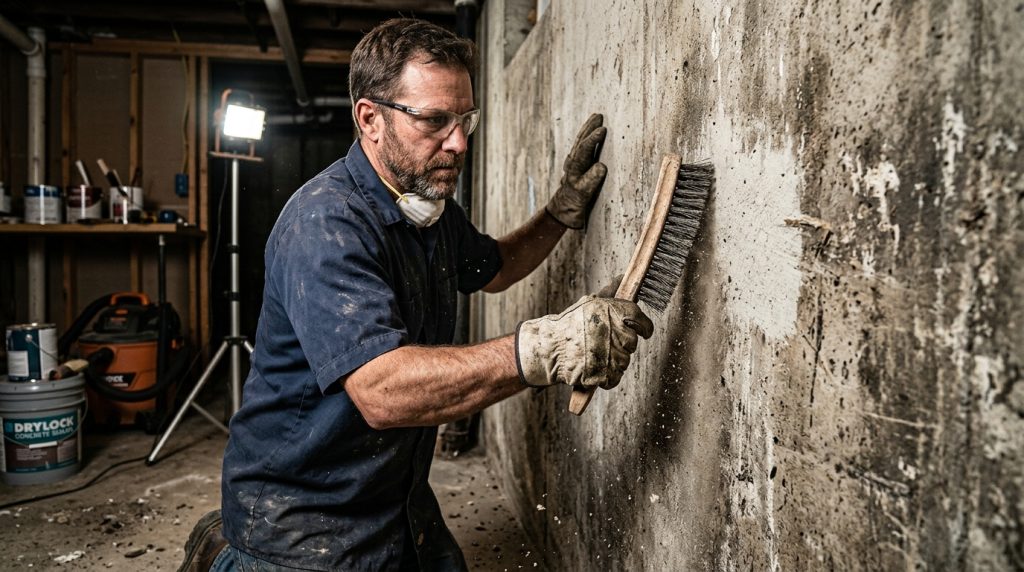
Step 2: Clean and Prep the Surface
This step matters more than most people expect.
If the surface isn’t clean, the sealer won’t bond properly.
What to do:
- scrub the area with a wire brush
- remove dirt, dust, and loose material
- clean off any existing flaking coatings
- let the surface dry (or slightly damp if product requires it)
Skipping prep is one of the biggest reasons DIY waterproofing fails.
Step 3: Seal Cracks and Joints
Before applying a full sealer, you need to handle the obvious entry points.
Focus on:
- vertical cracks
- floor-to-wall joints
- gaps around pipes
Use:
- hydraulic cement for active leaks
- crack fillers for smaller gaps
This step is critical if you’re trying to stop basement leaks effectively, not just temporarily cover them.
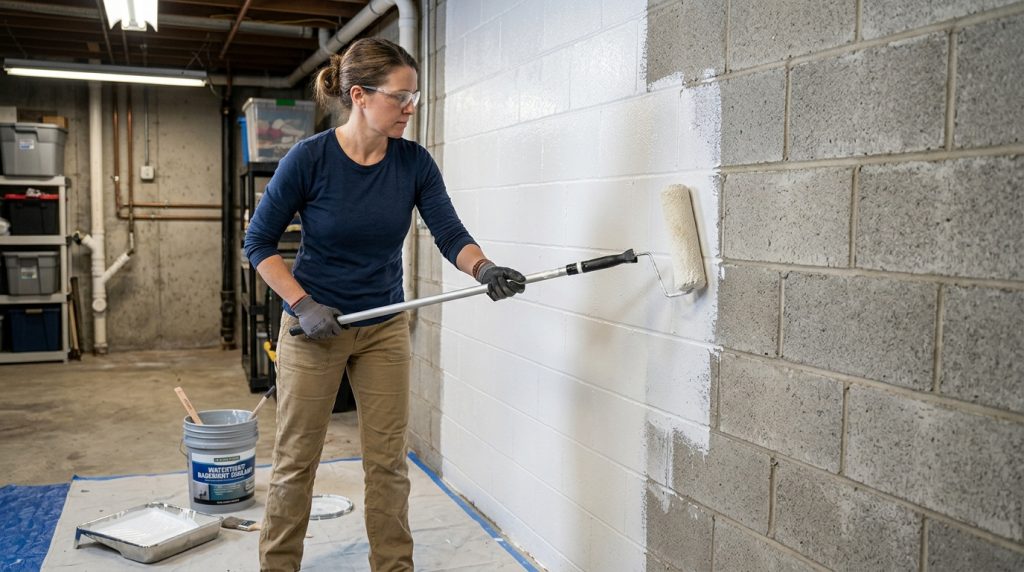
Step 4: Apply a Basement Waterproofing Sealer
Waterproof coatings work by creating a barrier that limits moisture penetration through porous concrete, a concept explained well by the Portland Cement Association.
Now you’re creating the barrier.
Using a product like BEEST Waterproof Sealant, apply it across:
- basement walls
- floors (if needed)
- problem areas where moisture appears
Application tips:
- use a roller or sprayer for even coverage
- apply in thin, consistent coats
- allow proper drying time between coats
This is what actually creates your water-resistant barrier.
For many homeowners, this is the step that makes the biggest visible difference.
If you’re going the DIY route, this is where using a reliable product really matters. A sealant like BEEST Waterproof Sealant is designed specifically to bond with concrete and help block out moisture long-term—so you’re not redoing the job in a few months.
Step 5: Manage Moisture Going Forward
Sealing helps—but managing moisture keeps the problem from coming back.
A few smart habits:
- run a dehumidifier in humid seasons
- check gutters and downspouts outside
- make sure water drains away from your foundation
- avoid letting water pool near the home
Waterproofing works best when you reduce the pressure on your basement walls.
Common Mistakes to Avoid
Skipping Surface Prep
If the surface isn’t clean, the sealer won’t bond properly.
Only Treating the Symptoms
Sealing without fixing cracks or drainage issues leads to repeat problems.
Applying Too Thick
Thicker doesn’t mean better. It often leads to peeling.
Ignoring Moisture Sources
Water will always find the easiest path. Reduce pressure, don’t just block it.
Frequently Asked Questions (FAQs)
Yes. Many homeowners successfully waterproof basements from the inside using sealers, crack repair, and moisture management.
A high-quality waterproof coating like BEEST Waterproof Sealant is designed to bond with concrete and create a moisture barrier.
It depends on the cause. Interior waterproofing works well for minor leaks and moisture, but major structural issues may require additional solutions.
When applied correctly, many sealers last several years, especially when combined with proper moisture management.
If moisture is limited to small leaks, damp walls, or minor cracks, interior waterproofing is usually enough. If you’re seeing standing water or repeated flooding, additional drainage solutions may be needed.
The Bottom Line
Waterproofing a basement doesn’t have to be overwhelming or expensive.
With the right approach, most homeowners can:
- identify the source of moisture
- seal cracks and weak points
- apply a reliable basement sealer
- reduce future water issues
If you’re dealing with light to moderate moisture problems, a waterproof basement DIY approach is often enough to protect your space and avoid bigger issues later.
Do it right once, and your basement stops feeling like a risk… and starts feeling like usable space again.